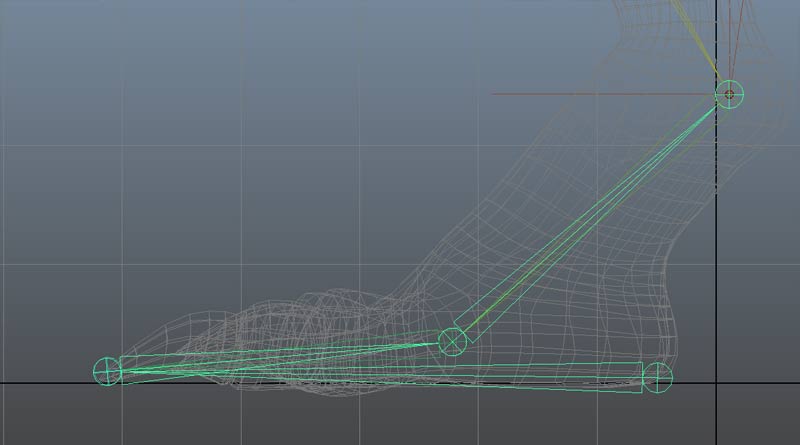
In the side view add the following joints:
Heel_RF_L
Toe_RF_L
Ball_RF_L
Ankle_RF_L
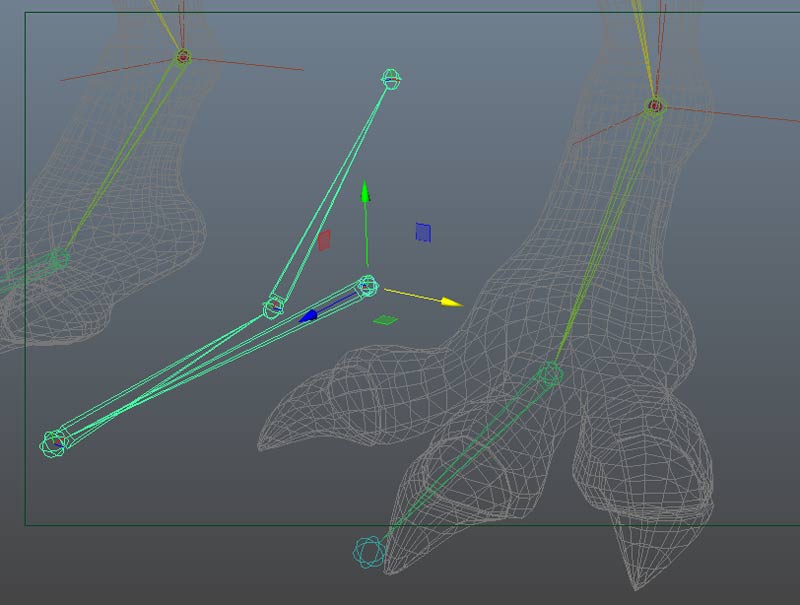
Go to the perspective view, select Heel_RF_L and use the moveTool.
Hold down the "v" key and snap to the left foot joints.
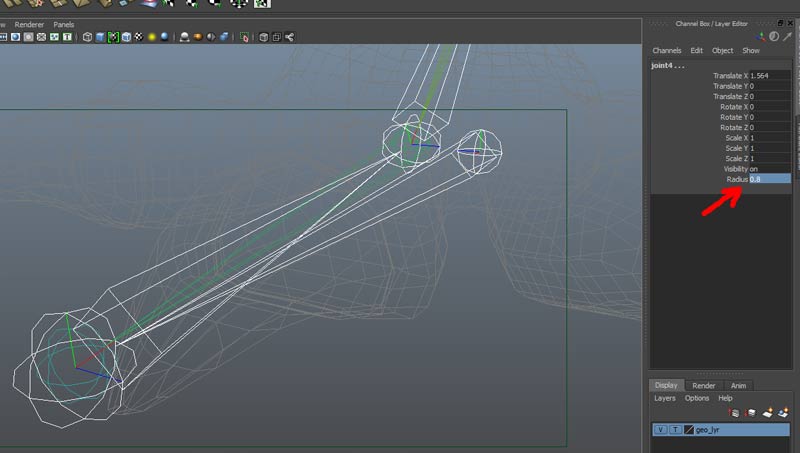
Change the reverse foot joint radius sizes so we can distinguish these from the regular foot joints. Select the hierarchy from Heel_RF_L and increase the radius value to 0.8 in the channel box:
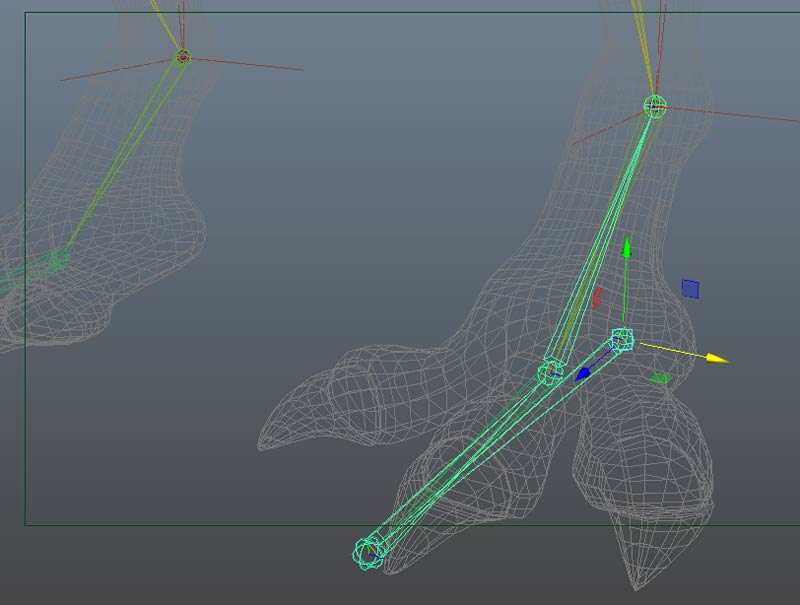
Next, we want to snap Heel_RF_L to the regular toe joint. In order not to move the children joints, we need to move the joint pivot and not the joint. Hit insert, hold down the "V" and snap
dragging the yellow circle. Repeat for the Ball_RF_L and the Ankle_RF_L.
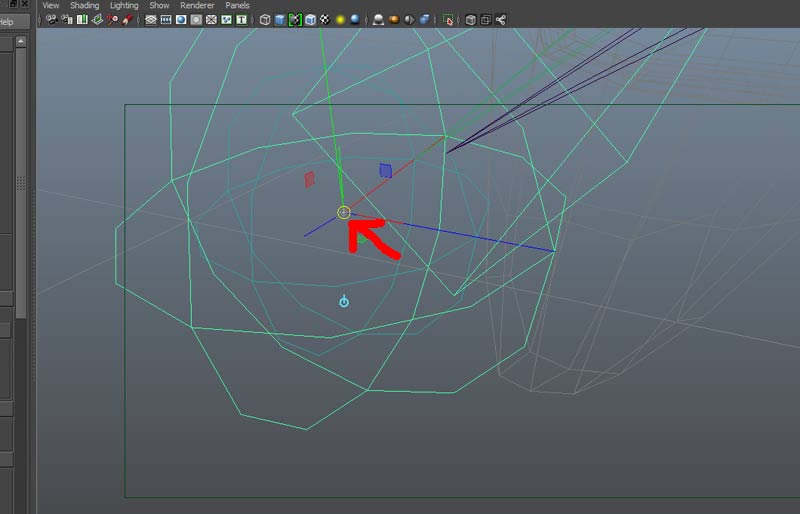
hit insert to get out of pivot mode.
Run Skeleton->Orient Joint with default values just to make sure the orientation is correct.
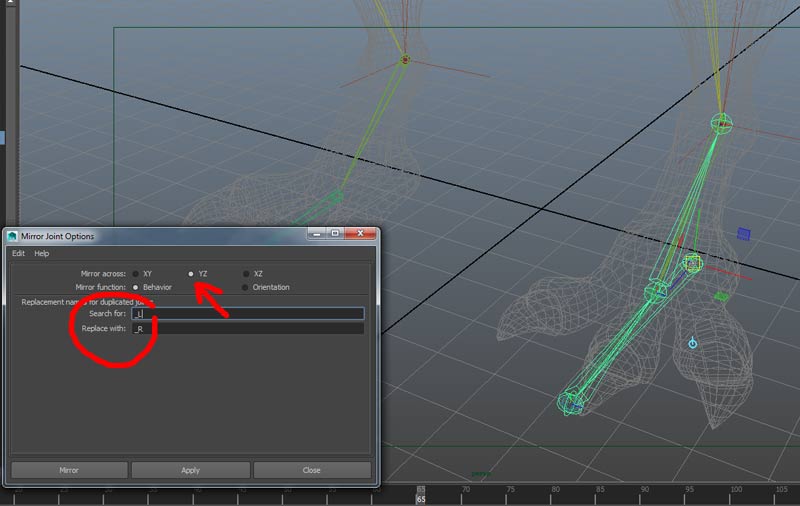
Select Heel_RF_L and use Skeleton->Mirror Joint to mirror the reverse foot across the YZ plane.
Now we can constrain the foot to the reverse foot.
1) Select ankle_RF_L, shift select foot_IK_Handle_L then point constrain
This makes sure that when the ball_RF_L rotates (for instance if the character walks on the balls of his foot) the leg will rise up and follow the motion of the reverse foot ankle.
2) Select the Ball_RF_L, shift select Ankle_L and orient contrain WITH Maintain Offset checked.
The reason for this is a little harder to visualize, until we realize that the Z rotation axis for these two joints are 180 opposite. With the orient constraint, a positive rotation of Ball_RF_L will result in an apparent negative rotation in the Ankle_L joint. since they start out parallel, this insures that the two joints stay parallel. When this is combined with the point constraint above, we have the two joints locked in a collinear relationship.
3) Select Toe_RF_L , shift select Ball_L and orient constrain WITH Maintain Offset checked.
This is for the same reason above, but for the toe to ball segment.
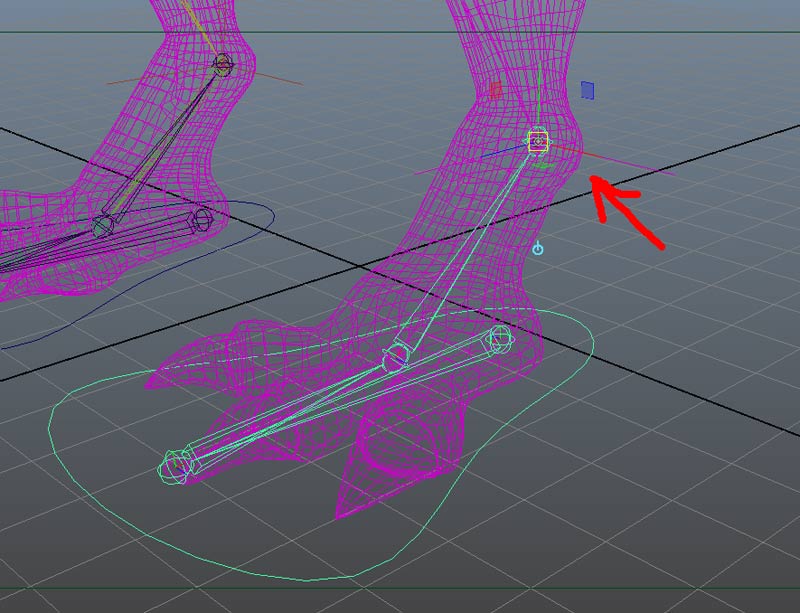
Create a Nurbs circle and position and scale around the left foot.
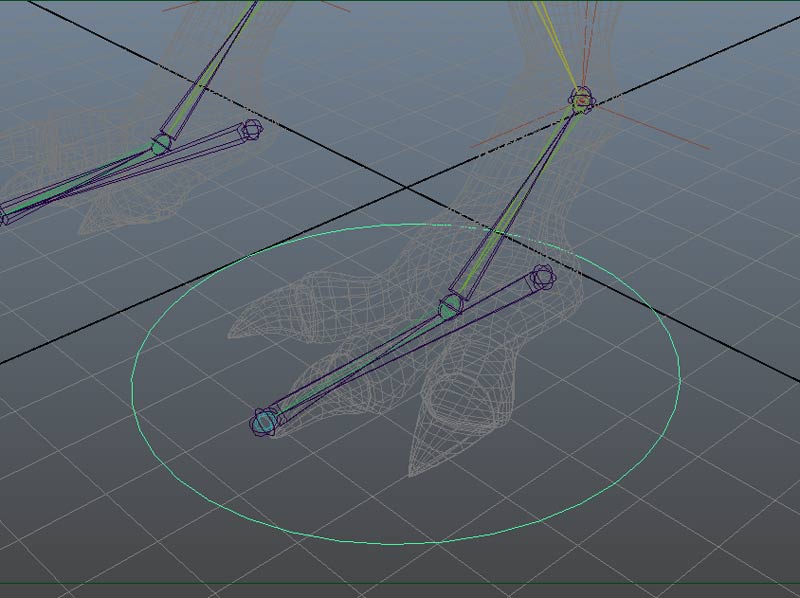
Use curve CVs to shape the circle to fit the foot.
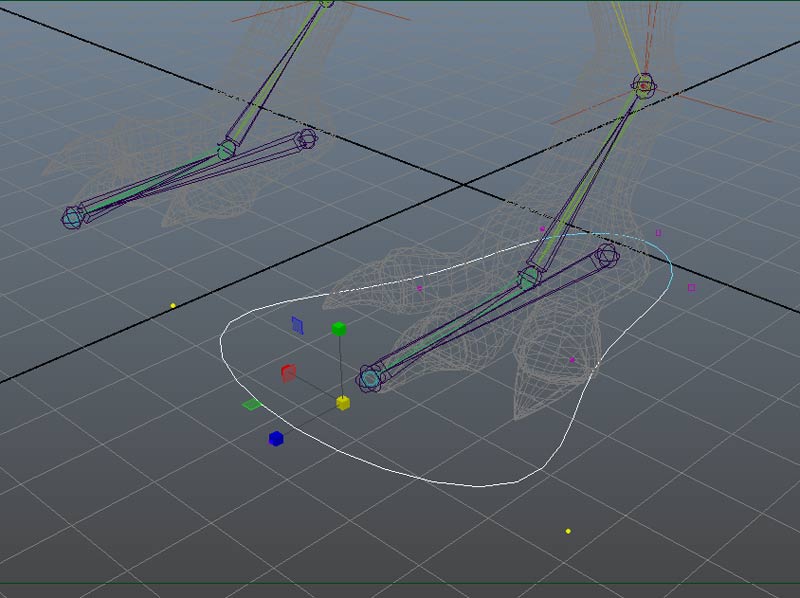
Rename to Foot_Control_L, freeze transforms and Edit->Delete By Type History
Use duplicate and scale -x to make a right foot control (group, duplicate, sx = -1 on copy, ungroup both and freeze transforms).
Parent Heel_RF_L to Foot_Control_L.
Move the Foot_control_L pivot to the ankle_L
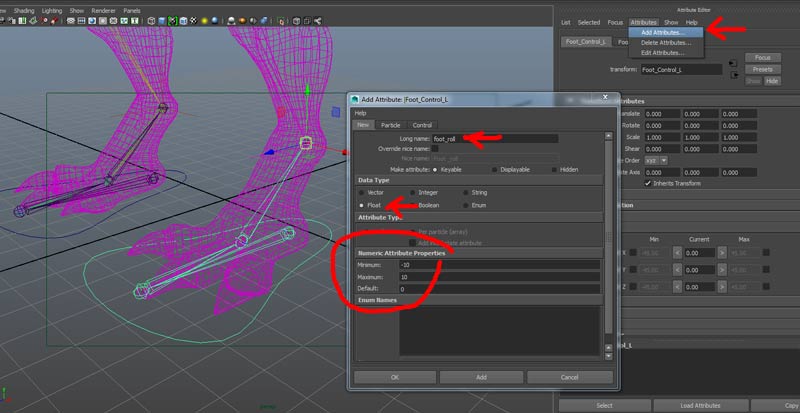
With Foot_Control_L selected, open the attribute editor. Add a float attribute called foot_roll, minimum -10, maximum 10, default 0
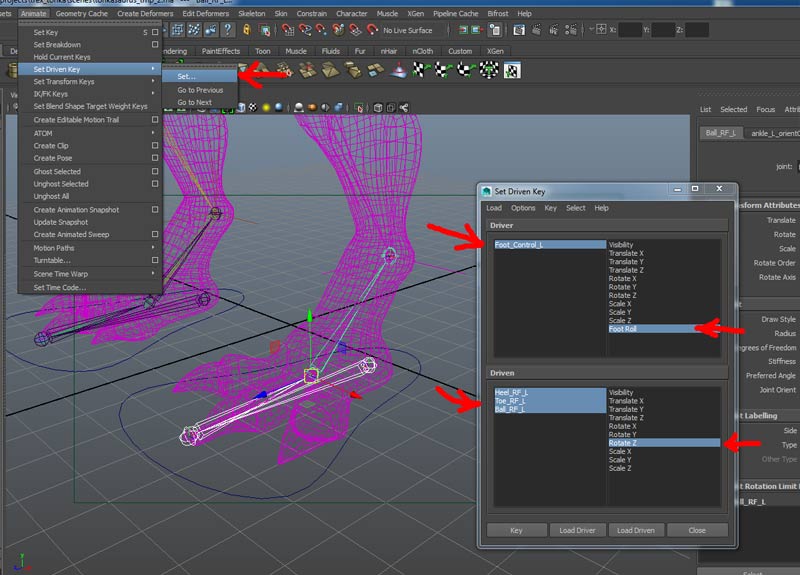
Now, connect foot rotations to the foot_roll attribute using Set Driven Key. Open Animate->Set Driven Key->Set...
Load Foot_Control_L foot_roll as Driver and Heel_RF_L, Ball_RF_L and Tow_RF_L rotate Z as Driven.
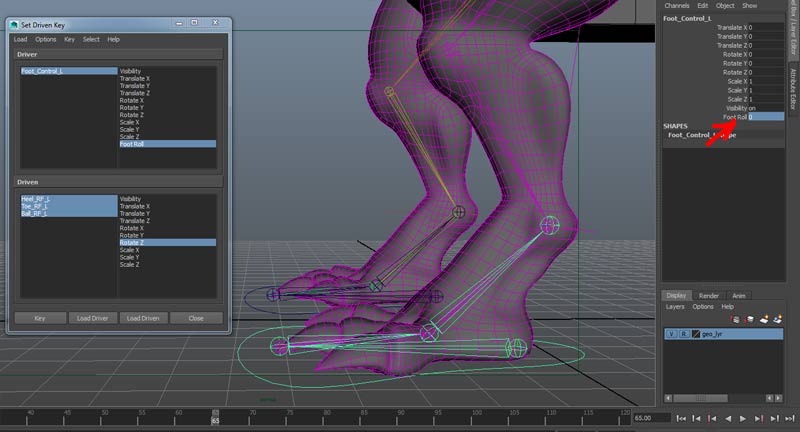
Set a key with foot_roll = 0.
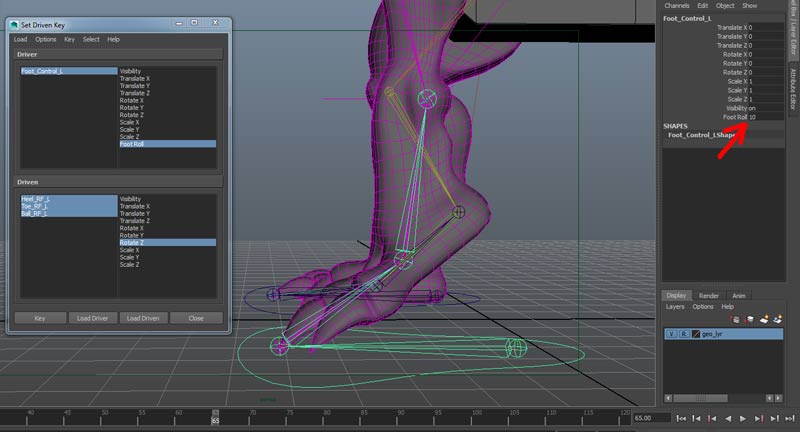
Set a key at foot_roll = 10, Toe_RF_L.rz = 30, Ball_RF_L.rz = 10, Heel_RF_L = 0
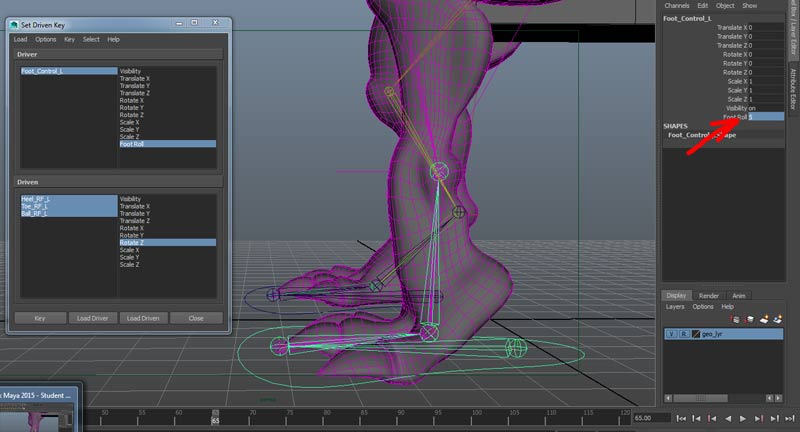
Set a key at foot_roll = 5, Toe_RF_L.rz = 0, Ball_RF_L.rz = 45, Heel_RF_L = 0
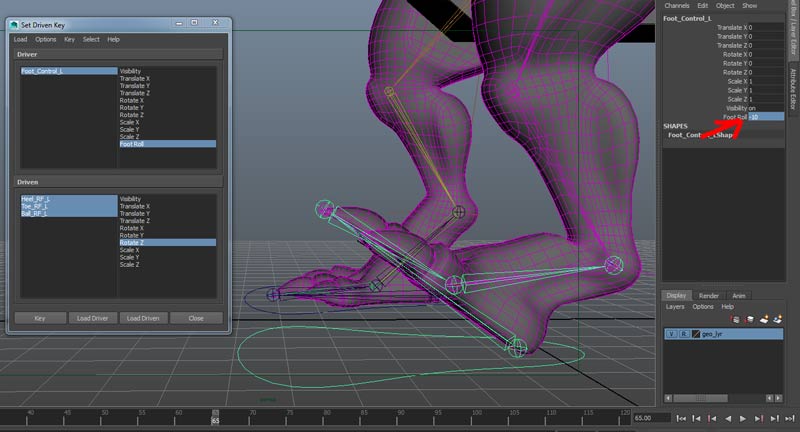
Set a key at foot_roll = -10, Toe_RF_L.rz = 0, Ball_RF_L.rz = 0, Heel_RF_L = 0
Test values of foot_roll: