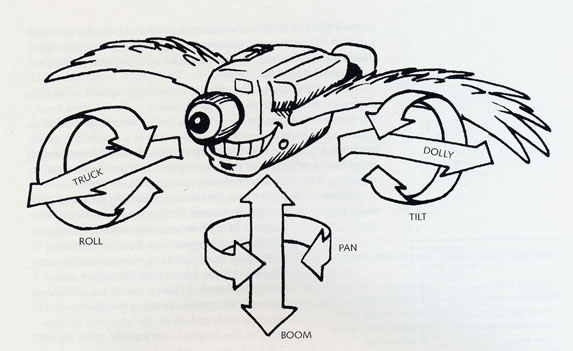
The camera position is often animated in computer animation for no good reason or no reason at all simply because the virtual camera can be moved easily. If you want to animate realistic and effective camera moves, study popular types of possible camera moves with a real camera. Try the following:
Image is from "The Art of 3-D Computer Animation and Imaging" by Isaac Kerlow
Ideally you would want to compile shots together with editing software, but if you are not familiar with Adobe Premiere or Final Cut Pro, you can do some limited editing in Maya.
Open ...\examples\week_13\camera_sequence_start.ma
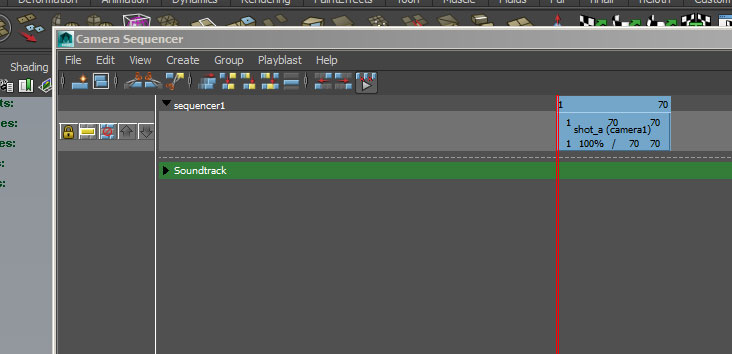
You'll notice four cameras. Camera1 is keyed for frames 1 to 70, camera2 for 71 to 101, camera3 for 102 to 135, and camera4 from 136 to 200. These will be the four shots we want to render.
Use:
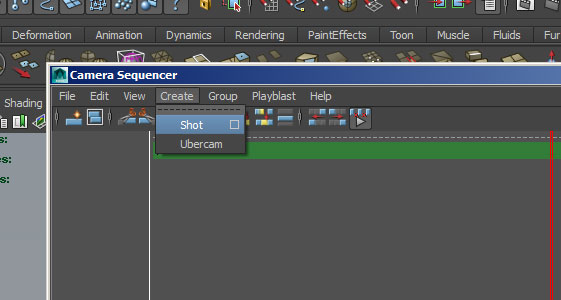
Window->Animation Editors->Camera Sequencer
and open the option box for the Camera Sequencer menu Create->Shot
Select the camera for the first shot (in this case camera1) and the frame range (for this shot 1 to 70). Since we are creating the shots in order we will set New Shot Placement to End of Sequence
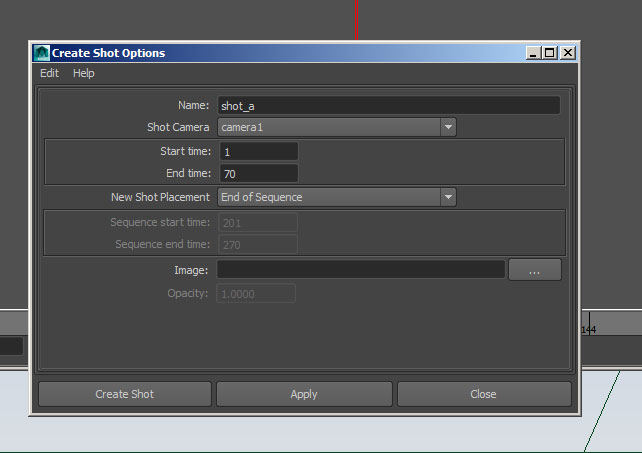
The first shot is created and entered on the default track. We could resize the shot, i.e. stretch it to a different frame range, but this would prevent us from being able to batch render the sequence, which pretty much negates any benefit of camera sequences. So...if you need to resize a shot, delete it and recreate it.
Repeat the process for shot2 (camera2), shot3 (camera3) and shot4 (camera4):

You can playblast the sequence in the Camera Sequencer window. Use:
Playblast->Playblast Sequence
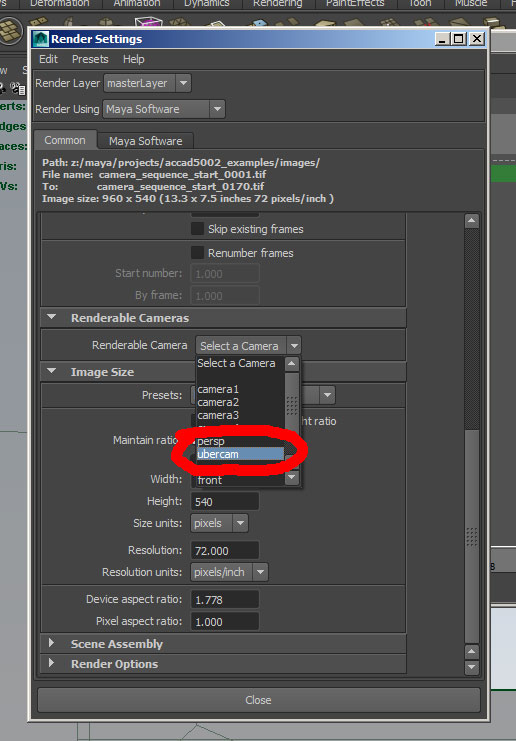
When you are ready to render, which camera do you set in the render settings? In order to batch render the camera sequence, we need to bake all of the cameras into one render camera. Maya calls this the Ubercam. Once you are ready use:
Create->Ubercam
When you open the render settings, you find the ubercam is now a render camera option. Select this and set the other render settings (File ext, start/end frame, etc) and batch render as you did in Project 2.
Open ...\examples\week_13\camera_motion_path_start.ma and switch to the Animation Menu set
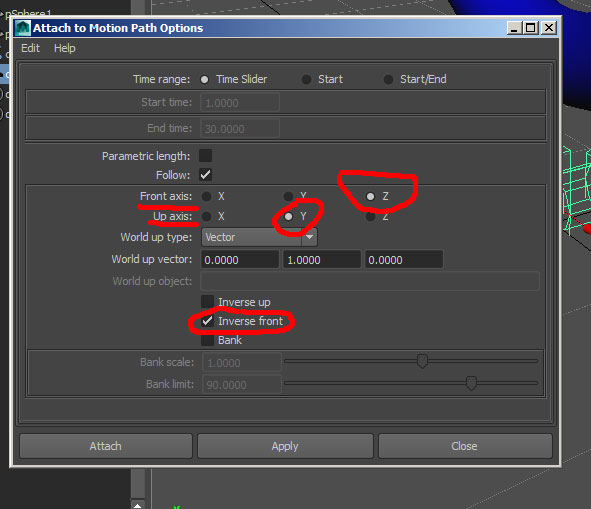
Create a camera. Notice that the camera lens points in the negative Z direction, and that positive Y is the "up" direction for the camera. So for this object, -Z is forward and Y is up:
To attach the camera to the curve1, we first select the camera, followed by the curve and then open the option box for:
Animate->Motion Paths->Attach to Motion Path
Front axis for the camera will be Z, the axis that runs through the lens. Since the camera points in the negative Z direction we must check Inverse front. And we check Y for the Up axis.
Scrub through the timeline and you can see camera1 running along curve1. Switch view to camera1 to see the camera threading the objects in the scene.
If we select the camera and look in the channel box we see that a motion path node is in the input section. Open this to see the U value. This controls motion along the path over time. A value of 0 places the attached object (in this case camera1) at the beginning of the curve, and a U value of 1 places the object at the end of the curve.
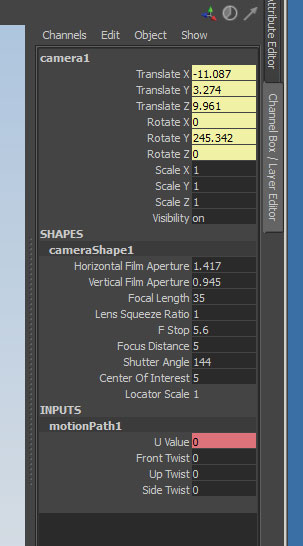
We can add additional keys to control progress over the curve. Open the graph editor to see the curve for the motion path: