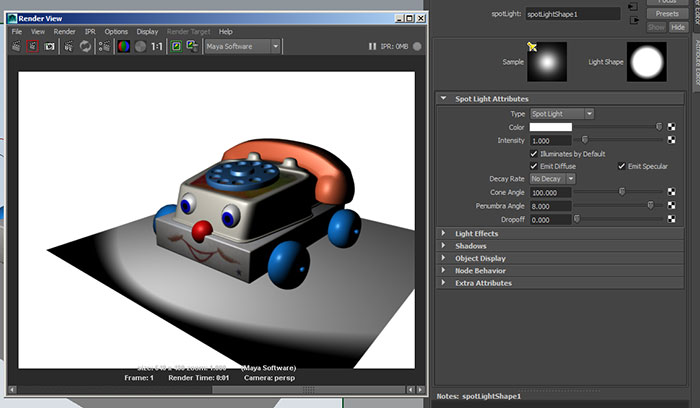
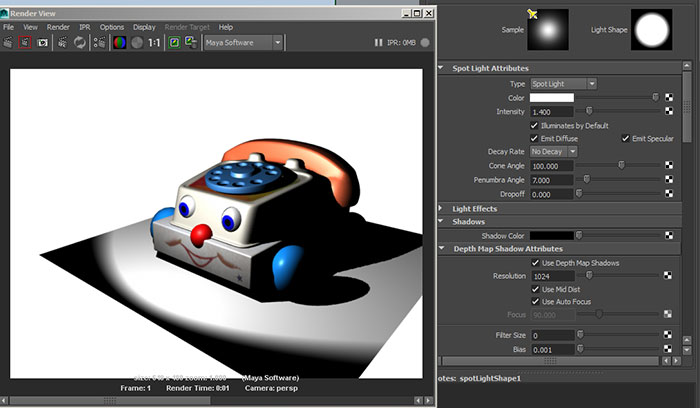
So far we haven't seen shadows in our renders. We have seen areas which are unlit, meaning either that the surface is outside the area of illumination (the front of the ground plane) or that the surface is not facing the light (the side of the phone). But we haven't seen a case where one object is blocking the light from reaching another object (the area underneath the phone).
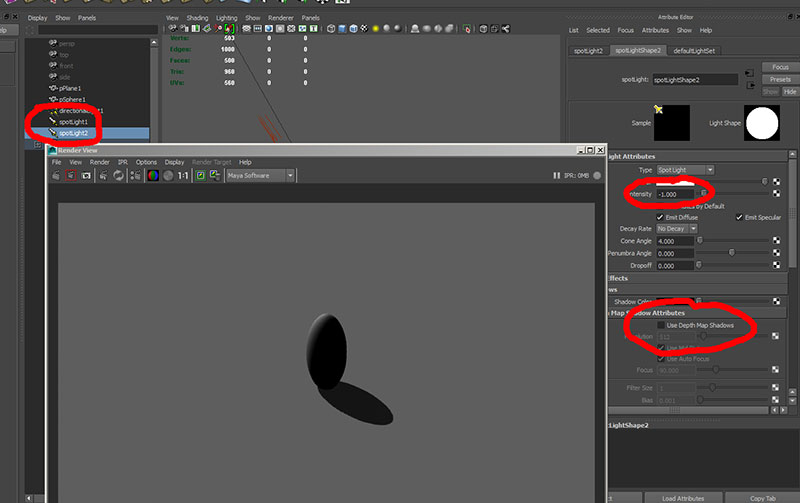
The first method of creating shadows in Maya is Depth Map shadows. To turn on depth map shadows, open the Shadows and Depth Map Shadow Attribute Tabs in the attribute editor for a spot light, and check Use Depth Map Shadows
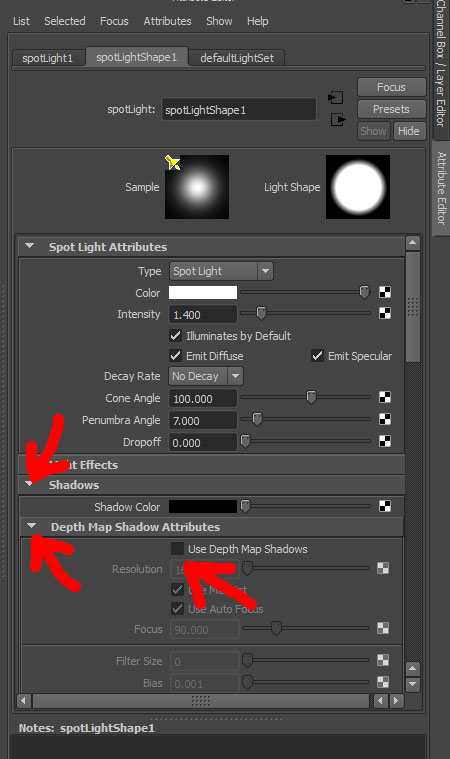
Once we enable Depth Map Shadows, the first attribute is Resolution. Set this to the lowest value of 16, and Filter Size to 0, and render:

This is not what we are looking for in a shadow, but it helps us understand what Maya is doing to calculate the shadow.
If we look through the spot light (Panels->Look Through Selected) we see:
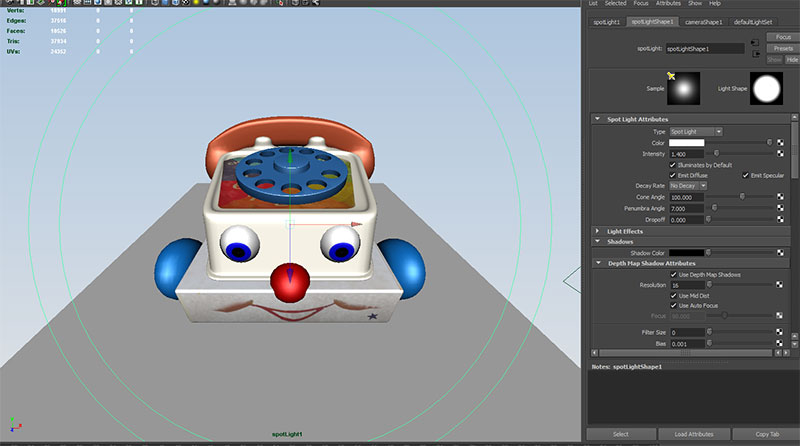
Maya takes this view and divides this into a 16x16 grid:
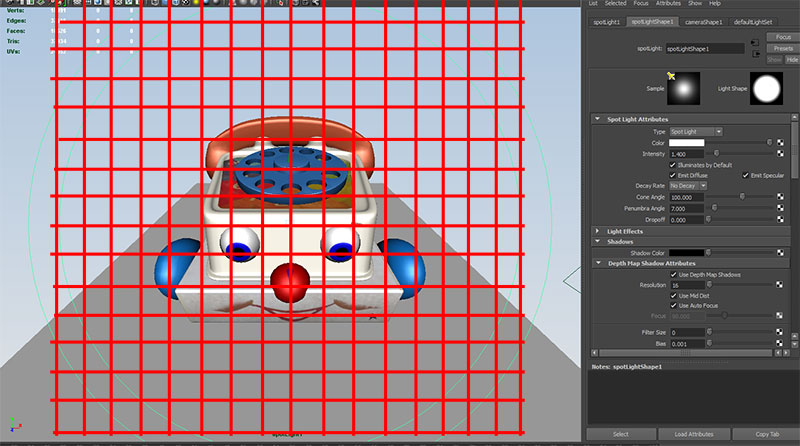
For each grid Maya finds the closest object to the camera. This grid of distances is the Depth Map. When Maya checks to see if a light is illuminating a point on a surface, it checks that surface's distance to the light against the value in the Depth Map. If the distance is greater than the Depth Map value, it is considered blocked, and not illuminated. For instance, if the blue wheel is a distance of 53 from the light, and is the closest object, it is illuminated. If the ground plane behind it is 59, it is not illuminated.
Errors occur due to a number of factors, but mostly due to how Maya interprets competing information within the grid. What if part of the ground plane and the edge of the wheel both share a grid? Maya has to choose one value.
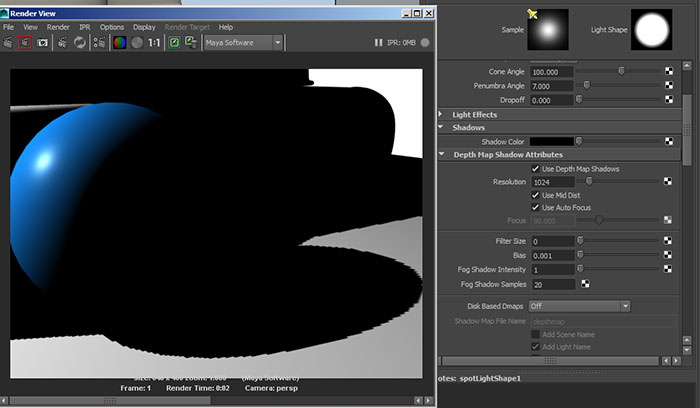
Some of these errors can be corrected by increasing the resolution of the depth map. If we up the resolution to 1024, we get a much better result:
But even at increased resolution we can still detect the characteristic stair step shape of depth map shadows if we zoom in close enough:
We can use the Filter Size to soften the edges of the shadow and a more believable result:
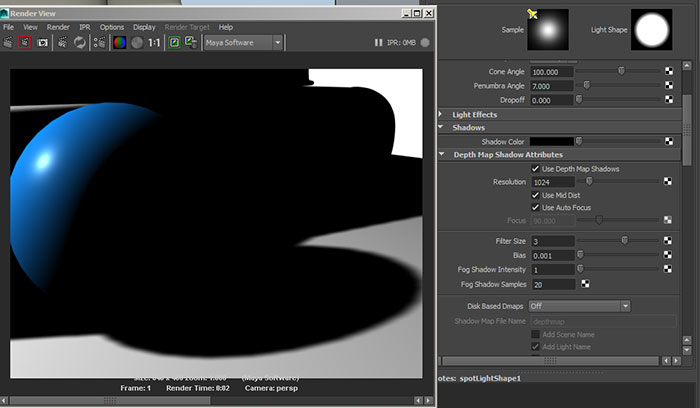
But increased resolution will increase memory requirements and render times. Likewise, increasing Filter Size also increases render times. Ideally you want to keep both at a minimum to satisfy the needs of a particular shot.
Another source of error often comes from closely placed surfaces, which results in a banding pattern on illuminated areas:
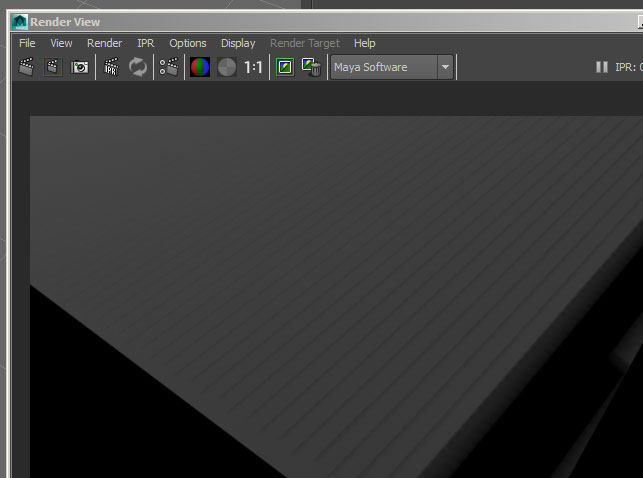
This can be removed by slowly increasing the Bias attribute until the banding is no longer present in your renders.
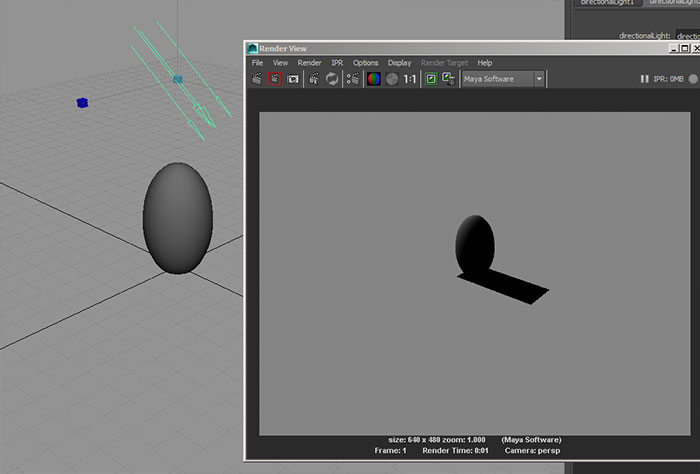
Directional Lights have their own particular set of problems associated with depth map shadows. Since they operate over an unbounded area, the depth map grid is assigned to fit the largest piece of geometry associated with the light. If we have one large object, say a ground plane, this might result in a course shadow being cast by a relatively small object.
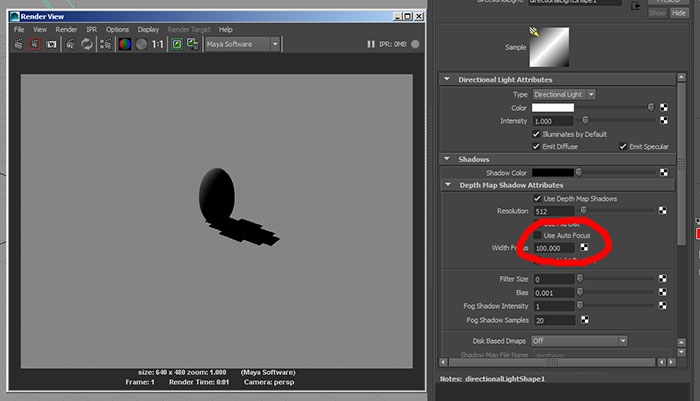
By unchecking Use Auto Focus, Maya scales the depth map to the area containing shadow casting objects. This somewhat refines our shadow:
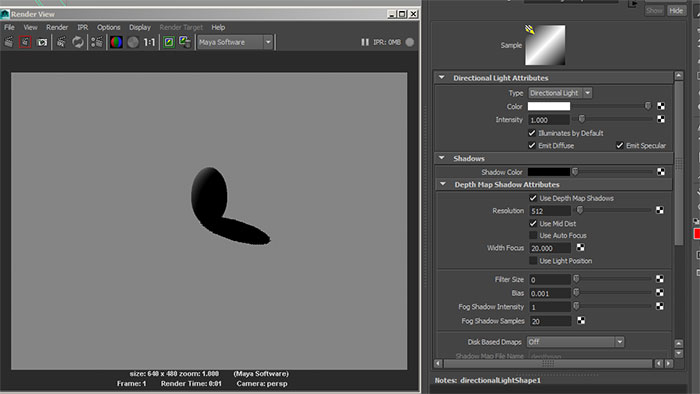
By reducing the Width Focus, we can further refine the shadow: In each case the depth map resolution is the same, but it is more focused to cover just the region where we need it.
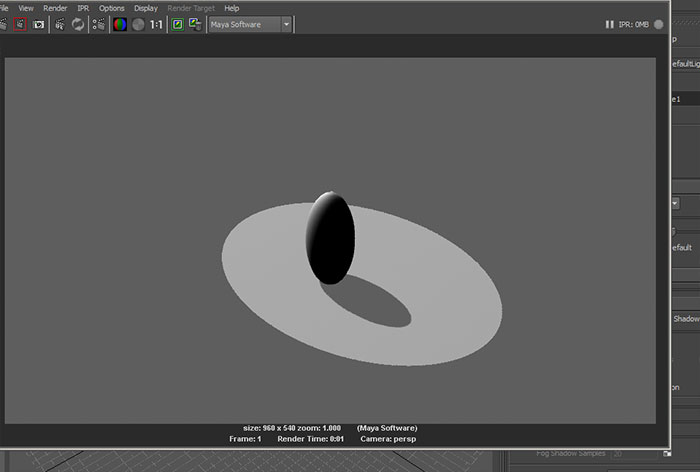
A different way around the problem of the light area spreading the depth map resolution thin is to use a more focused spot light which only casts a shadow. If we turn off depth map shadows for the directional light in the example above and add a shadow casting spot light we get this result:

The obvious problem with this is the extra illumination of the spot light.
However, this illumination can be canceled out by duplicating the spot light, and negating the intensity of the second light (if the first spot is intensity=1.6, the duplicate must be -1.6) and unchecking the Use Depth Map Shadows attribute for the duplicate spot. This will only work if both spot lights are identical except for the intensities and shadow casting attributes.
Depth Maps only look at objects, not surface properties. If I attach a checker utility node to the transparency attribute of a material, the depth map will only measure to the object surface and not "look through" the object due to transparency:
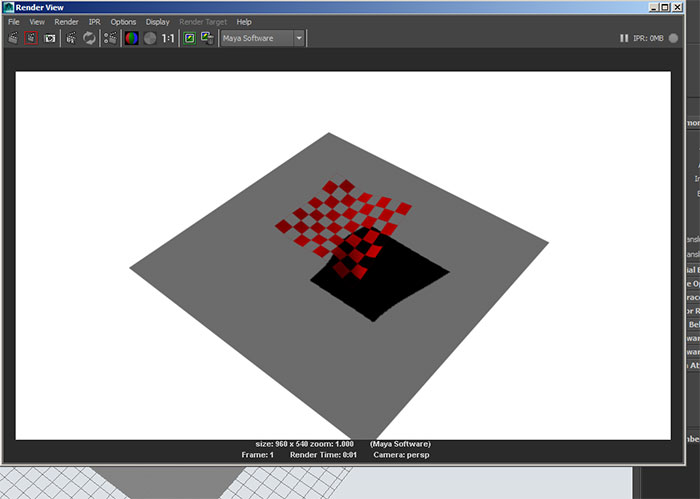
To create the correct shadows for transparency, we need a different algorithm.
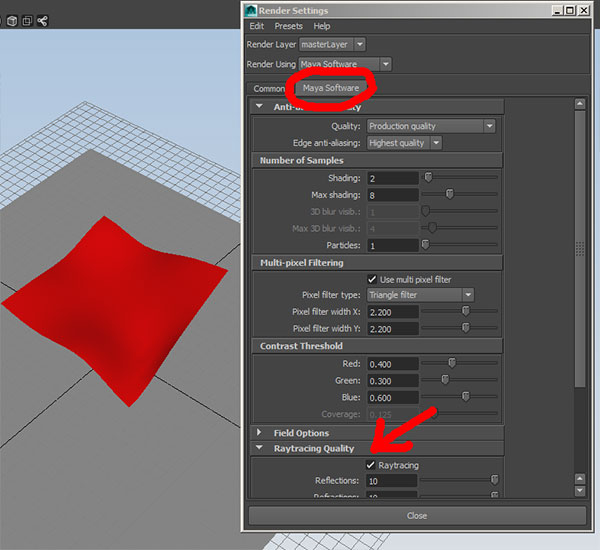
Select your light and uncheck Use Depth Map Shadows. Instead scroll down in the attribute editor and under Raytrace Shadow Attributes check Use Ray Trace Shadows.
If we now render , we won't see any shadows at all. We need to go to the render settings and turn on ray tracing. Go the render settings and in the Maya under the Maya Software tab and in the Raytracing Quality section check Raytracing
And re-render. Unlike Depth Maps, Raytracing traces the individual light rays for each point seen by the camera, checking surface properties for transparency and reflectivity along the way.
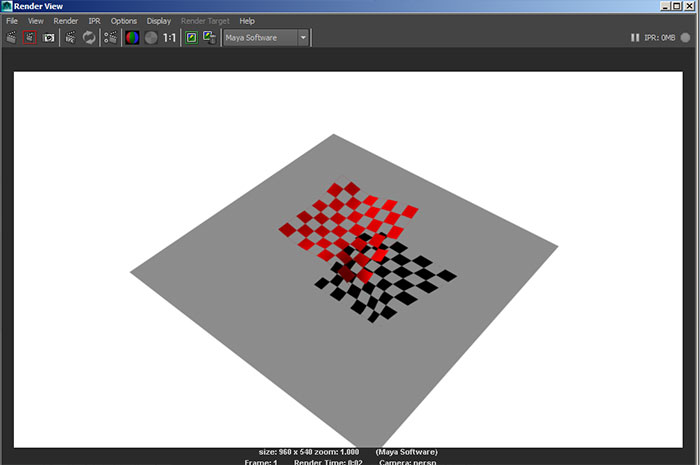
Note - if you see a slight grayness to the transparent sections of your shadows, open the material node with the transparency and under Raytrace Options reduce Shadow Attenuation to zero.
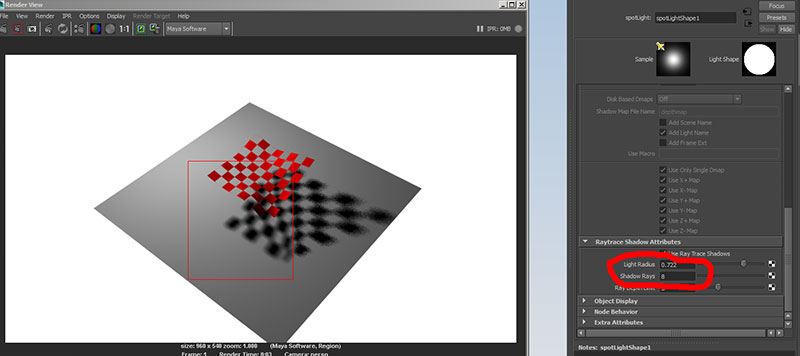
If we want softer shadows in Raytracing, select the shadow casting light, and in the attribute editor, increase the size of the Light Radius attribute. Since larger lights generate more diffuse light, this will soften the edges of our shadows, but this also creates grainer shadows in Raytracing. To soften the graininess, Increase the number of Shadow Rays. Both fields increase render times, so use the smallest value to achieve the results you need. Note - light radius is only available in point and spot lights.
The cost of using Raytracing is longer render times.