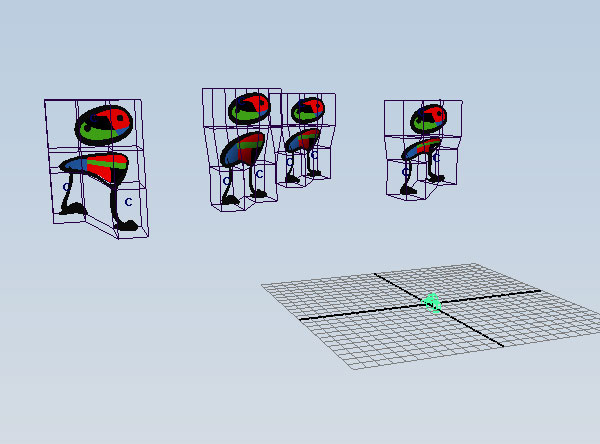
Open Y:\Courses\2012-2014\AC5002_Conroy_AU2013\examples\week_9\lattice_walk_end.ma
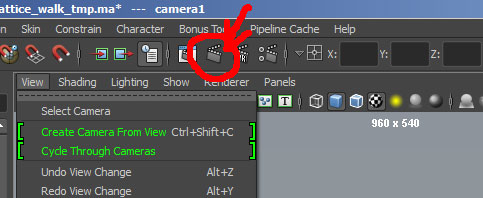
First let's create a camera which will represent the render view. Use
Create->Cameras->Camera
to create camera1
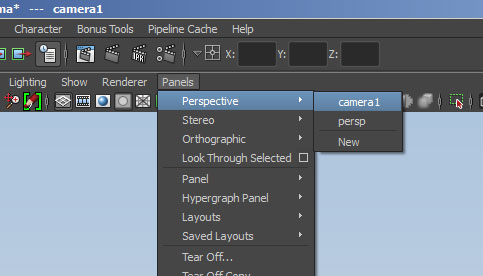
We can switch to this new camera with the workspace menu
Panels->Perspective->camera1
Once we are looking through the new camera, we can use the Alt-mouse buttons to control the camera.
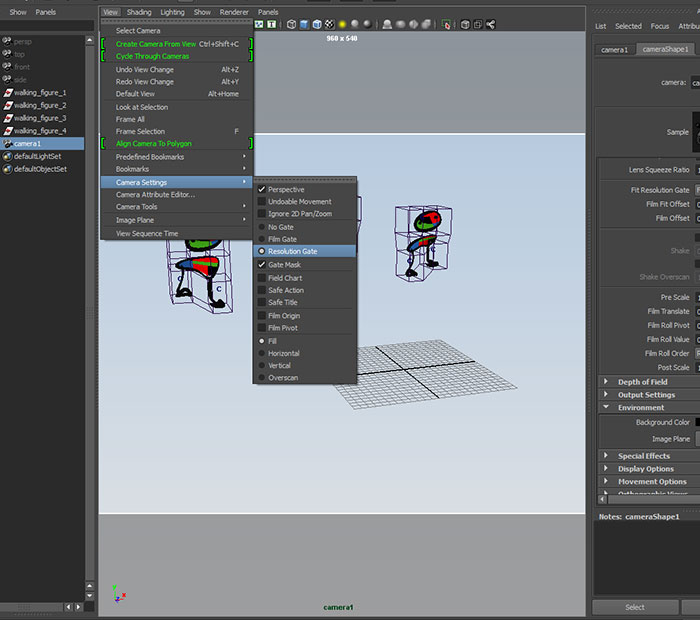
To see what will be framed in the rendered image. Use the workspace menu
View->Camera Settings and check Resolution Gate
To render this frame to an image use the Render The Current Frame icon:
This opens the Render View and renders the active workspace camera.
If we are happy with the way this is framed, key the translate and rotate values of camera1 on frame 1.
Use the camera's image plane to add a background:
View->Image Plane->Import Image
and use examples/week_10/miro_background.tif
If the background image is cutting off some of the figures, go to the channel box and increase the Depth attribute until all figures are visible.
Since we haven't covered lighting, let's add a few changes to compensate for the lack of Maya lights.
(Note: if you are doing something other than the Miro project, I'll help you set up quick lighting on Thursday).
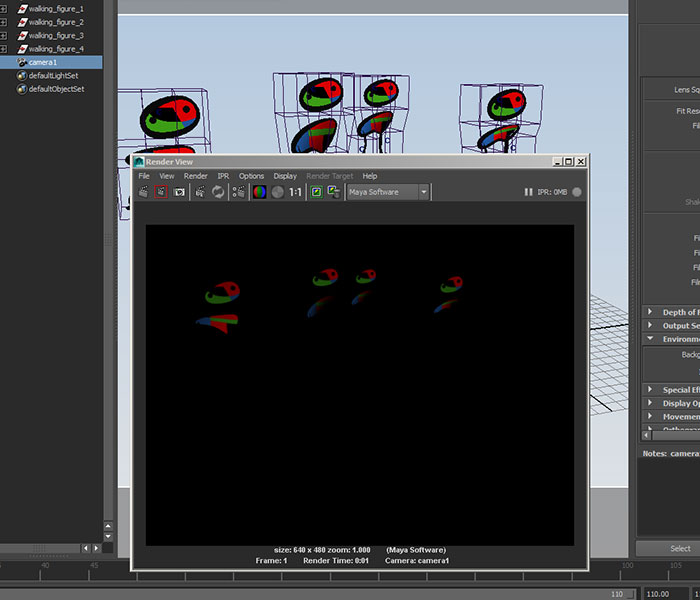
First, select face_mat in the Hypershade, and in the attribute editor, move the ambient color slider all the way to the right.
Normally, we would not want to do this. This flattens the objects since there will not be any shading which reacts to light. Fortunately this gives us a similar result to the source paintings.
This time use the Open Render View (the icon to the left of Render Current Frame). This opens the Render View without rerendering the image. So we are seeing the render before our change to the ambient color.
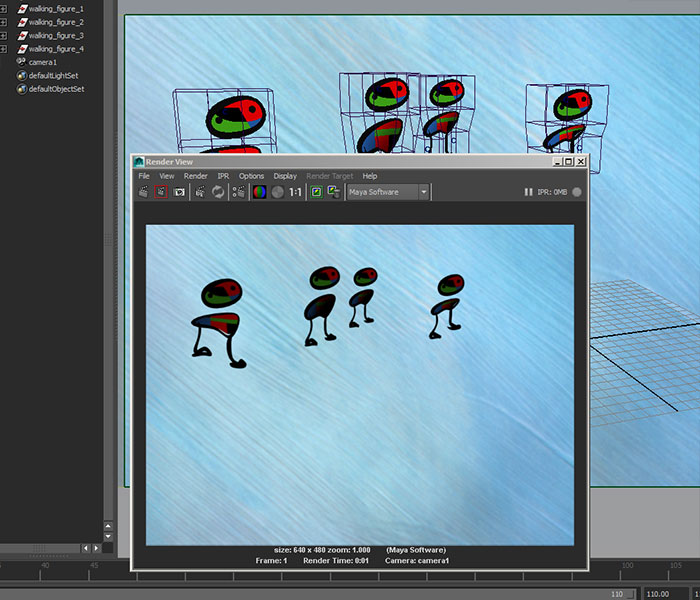
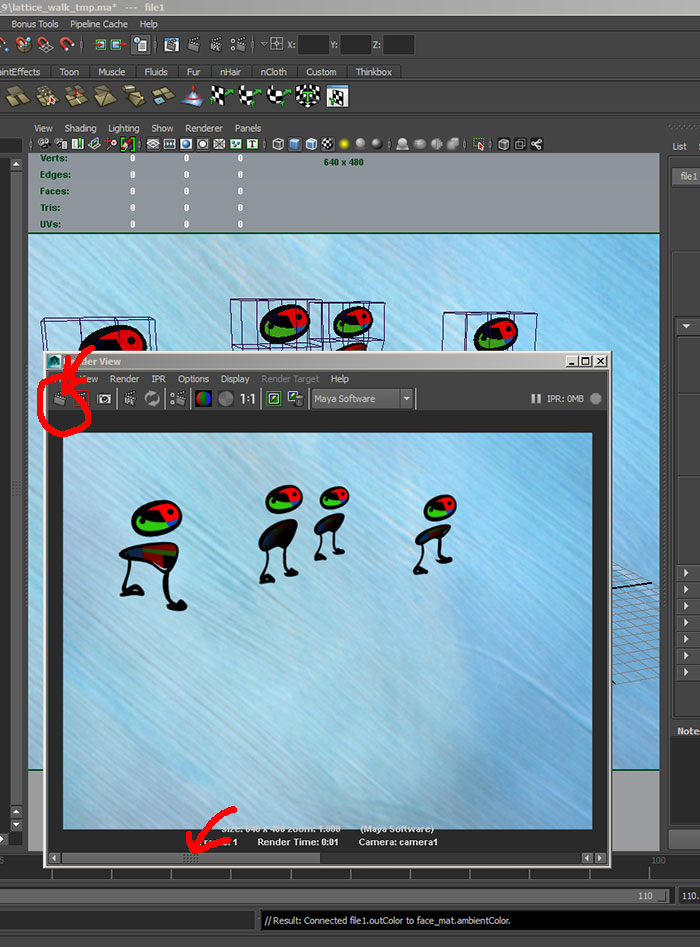
To save the current pre-ambient color change image use the Keep Image icon in the Render View:
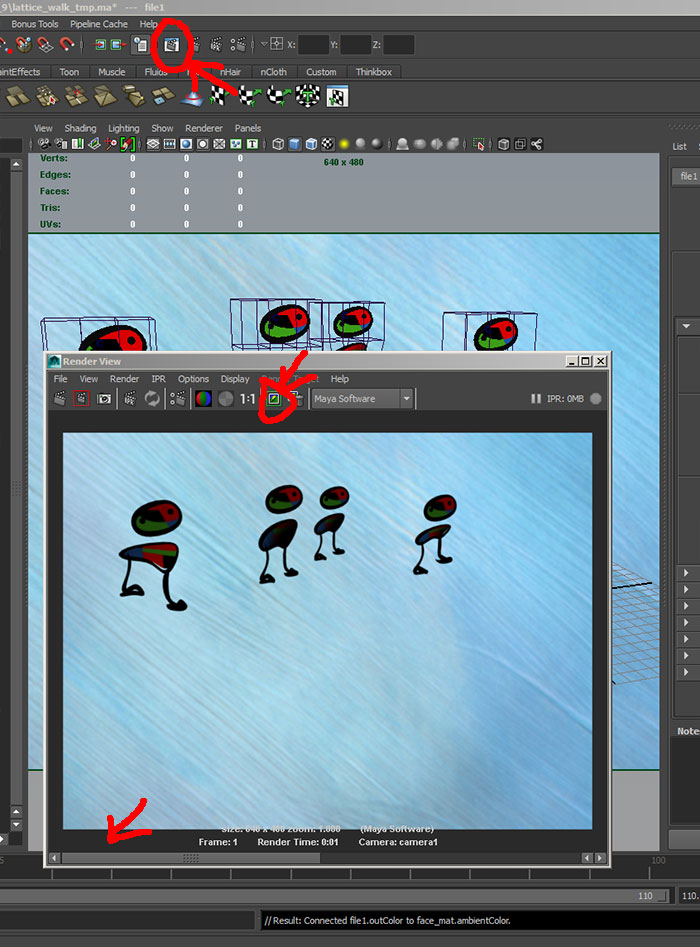
Notice a scroll appears at the bottom of the Render View.
Hit the Render Current Frame icon within the Render View:
and slide the scroll bar back and forth to see the affects of the ambient color change.
Now repeat for the body_mat and assign deform_test_1_body_planeShape.psd to the ambient color.
Open Render View and this time drag a rectangle over one of the figures of the body:
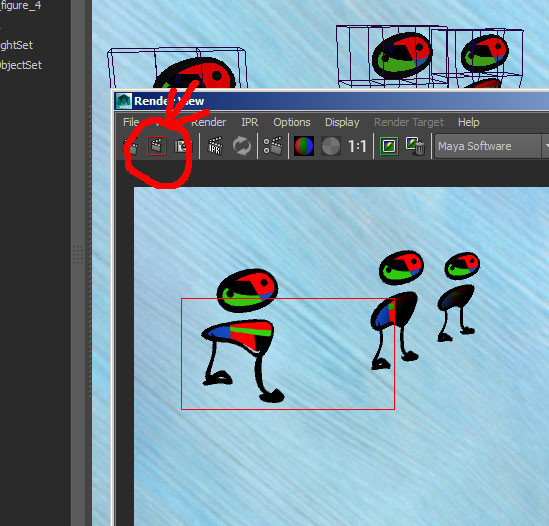
and use the Render Region icon. This only renders the area within the selected area. If you have a frame which takes a long time to render, this allows you to test a change relatively quickly on a small portion of the frame.
Now use Render Current Frame to re-render the whole frame.
Use the Render Settings icon to open the Render Settings Window:
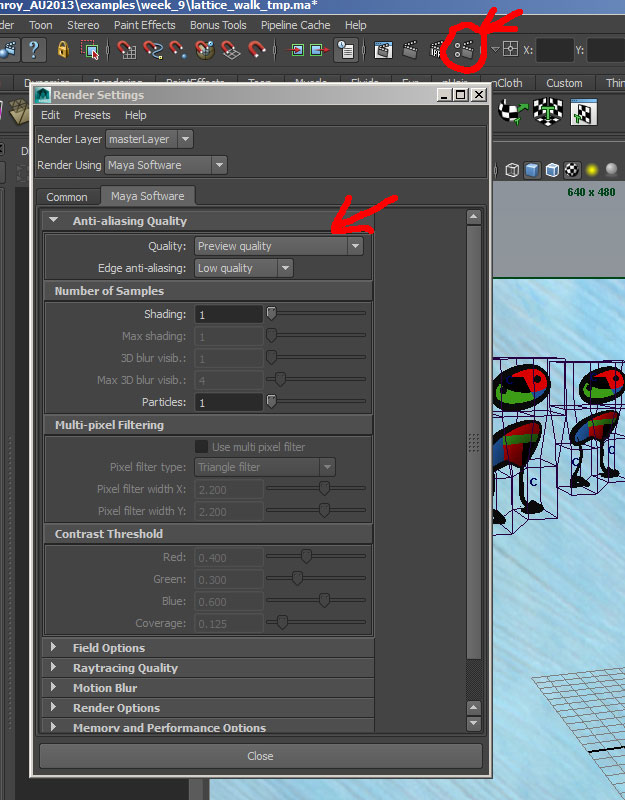
For this project we will use the default Maya Software renderer. First look in the Maya Software tab and the Quality setting. Re-render with the Preview quality and use Keep Image.
Now change to Production quality and do a Render Region. Use Alt-RMB to zoom within the Render View.
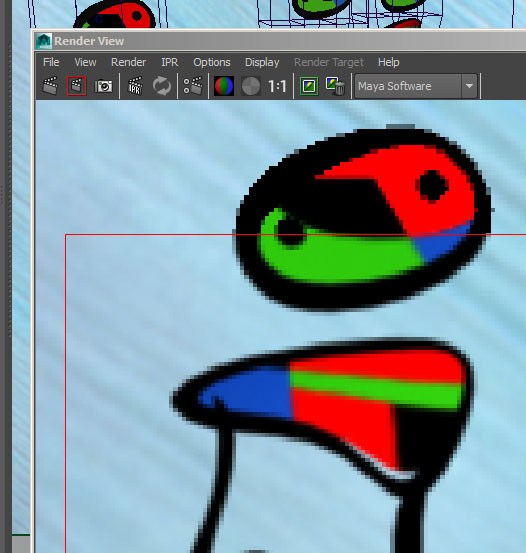
Here we can see the smoothing effects of anti-aliasing on the image. Preview quality can be used for test renders, but switch to Production quality for your final renders. Click the 1:1 icon to reframe image.
If your Time is not already set to 30 fps, change it now in
Windows->Setting/Preferences->Preferences
In the Settings category, under working units, set Time to NTSC (30 fps).
Go to the Render Settings window and to the Common tab:
If you set your project correctly, the path should be set to place the images in the <project>/images directory.
Select:
A file name prefix (e.g. "miro_walk")
An image format (use Tiff)
An Frame/animation extension (I use name_#.ext).
Frame padding (if your last frame is 3 digits long, use 3).
Under Frame Range, set your start and end frame numbers (e.g. 1 and 110 in this example).
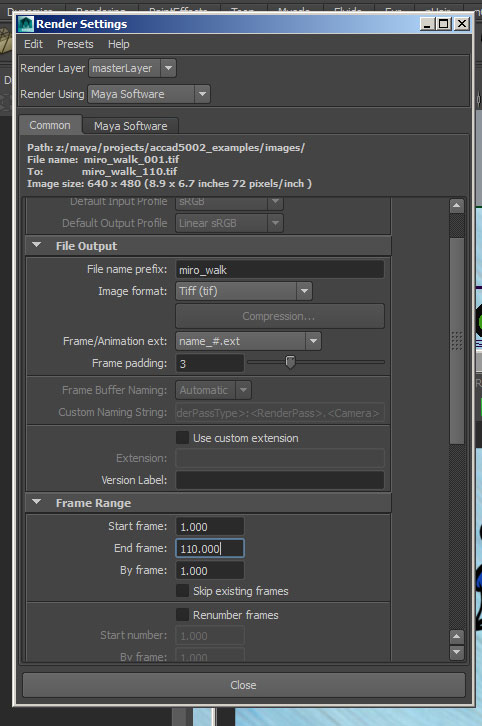
Scroll down and select the camera to render (camera1 in this example).
We can also select a different image size and aspect ratio. 640x480 is fine for this project.
Switch to the Rendering Menu set and use:
Render->Batch Render
You can follow the progress by opening the script editor:
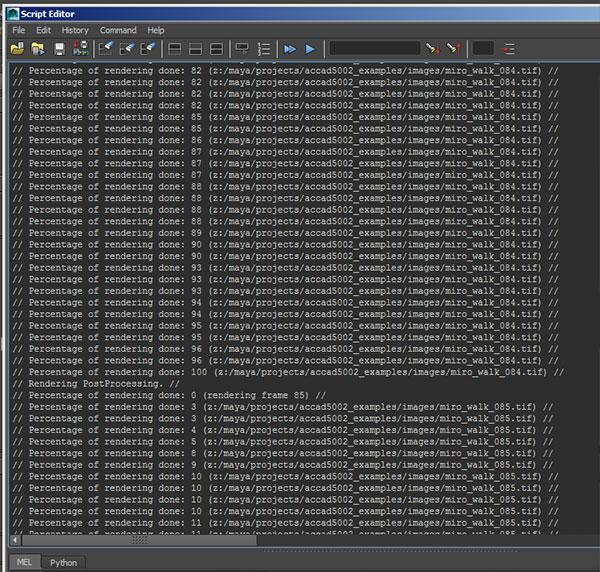
Under the Start button type fcheck.
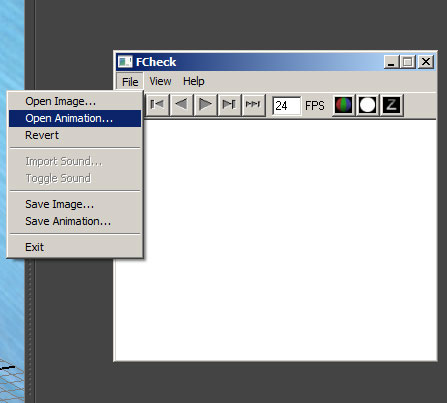
and Open Animation browse to your images directory and click the first frame of your animation.
Let it cycle once and change to 30 FPS.
Open the Adobe Premier and use
File->New Project...
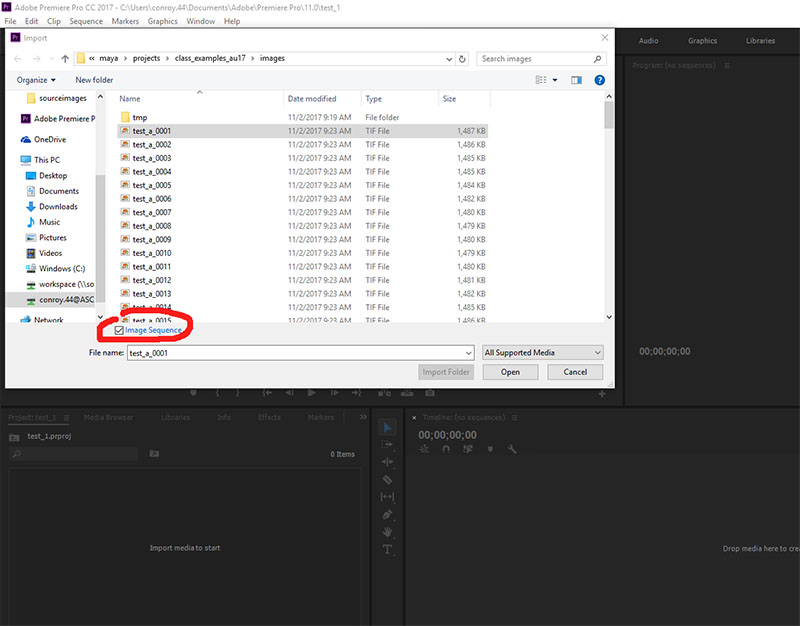
to create a project area. To import the frames use:
File->Import. Browse to your maya->projects-><proj_name>->images directory and select the first image in the sequence. Be sure to check the Image Sequence box:
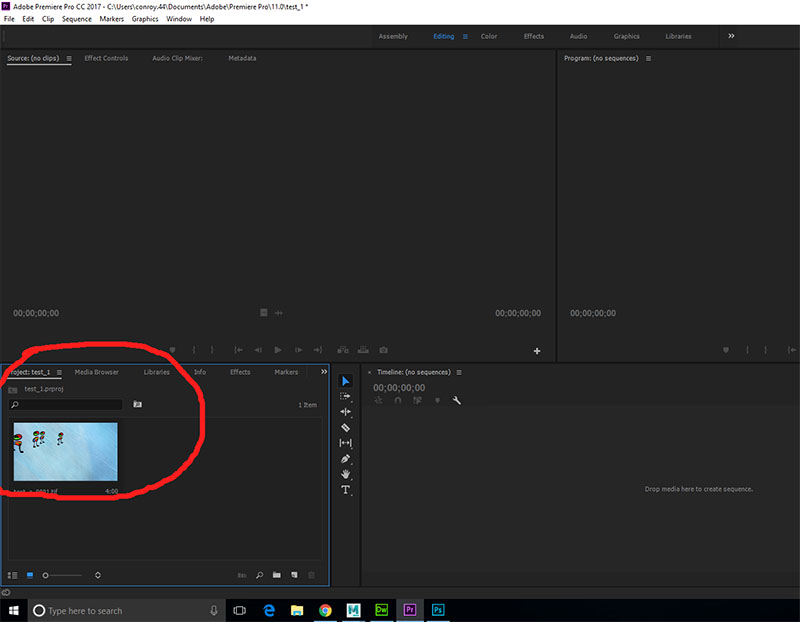
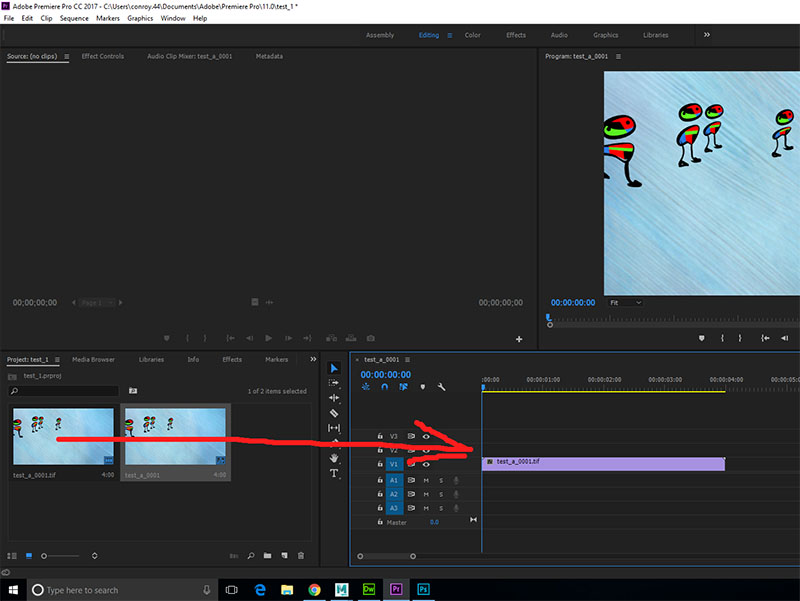
The sequence loaded in the Premier project window:
Click and drag the image sequence onto the timeline:
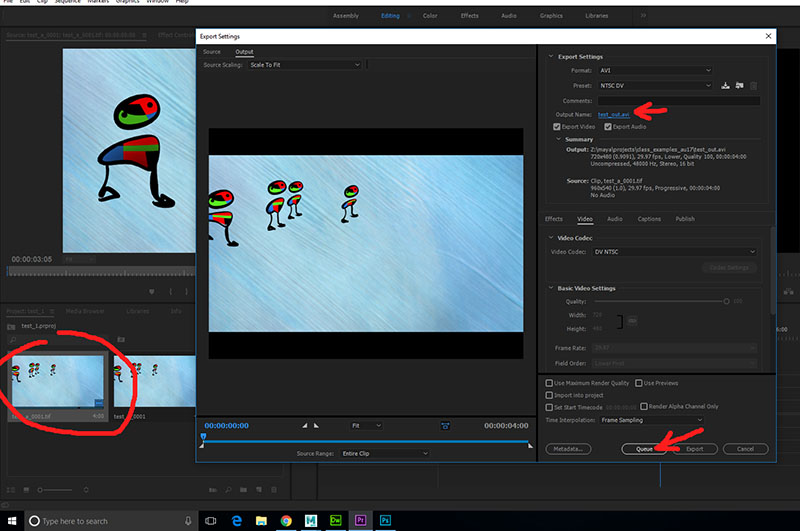
Select the Image sequence in the project window and use Use File->Export->Media...
Click on the output name to choose the movie name and output directory. Then hit Queue to render the movie:
selecting Queue will open the Media Encoder. hit the Green start triangle in the upper left corner of the window...
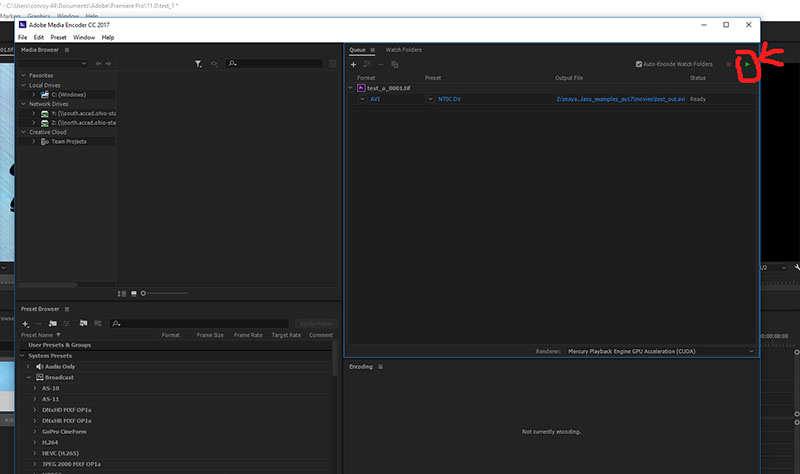
The avi file should be in the directory you specified in the Export settings...